
Getting Started
Thank you for your purchase of the ANT+ / BLE Wireless Resistance Control for the E-Motion rollers.
At any point please feel free to reach out directly to beta@insideride.com for personal assistance, to share feedback or ask questions. We have also setup a forum at http://insideride.uservoice.com/ so that you can share feedback.
Device Installation
For Wireless STANDARD model
Click here.
For Wireless PRO model
-
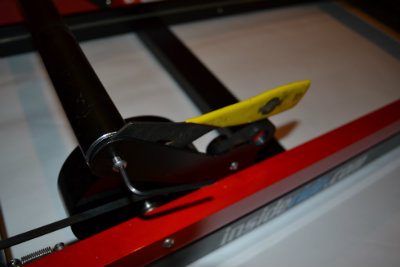
Remove the manual or existing wireless resistance control arm with 3 hex bolts (2 on the frame, 1 on the front bumper bar) using a 1/8" hex key.
It can be helpful to use a narrow wrench, or even just a flat screw driver to hold the nut inside while you unscrew:
Next remove the two hex bolts on the inside.
Removed:
-
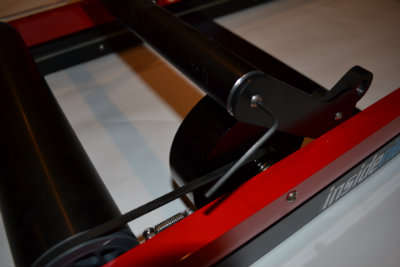
Install the new arm
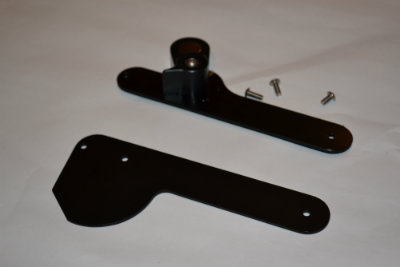
Using the smallest (of the 3 hex screws), secure the new arm onto the front bumper bar with notch towards roller frame:
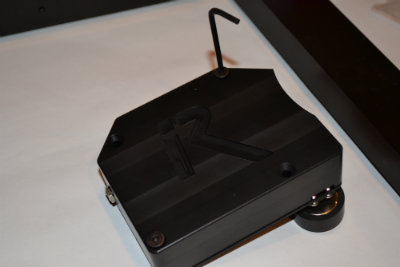
Remove the 2 hex screws to open the device:
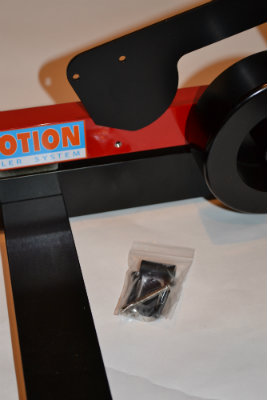
Locate your hardware pouch containing the new installation screws:
-
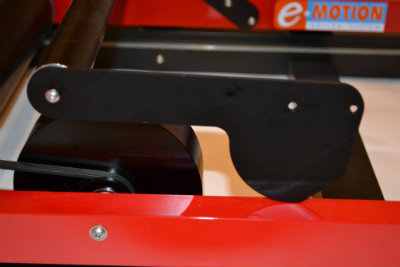
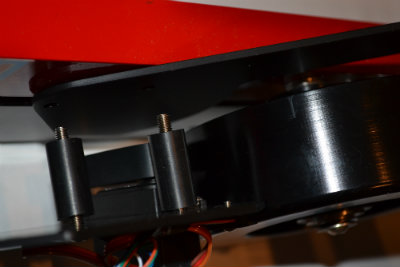
Attach the backing plate of the device to the arm using the 2 silver hex screws using the black plastic sheathings between the arm and the plate
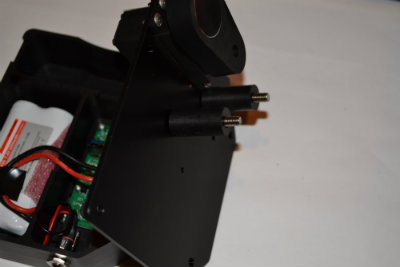
Align the screws with the holes in the arm and the roller frame to secure, leave the bolts slightly loose.
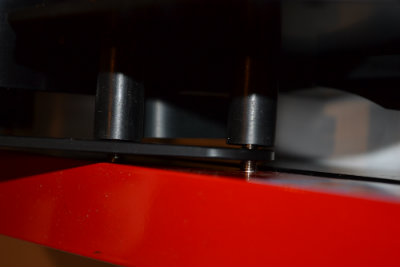
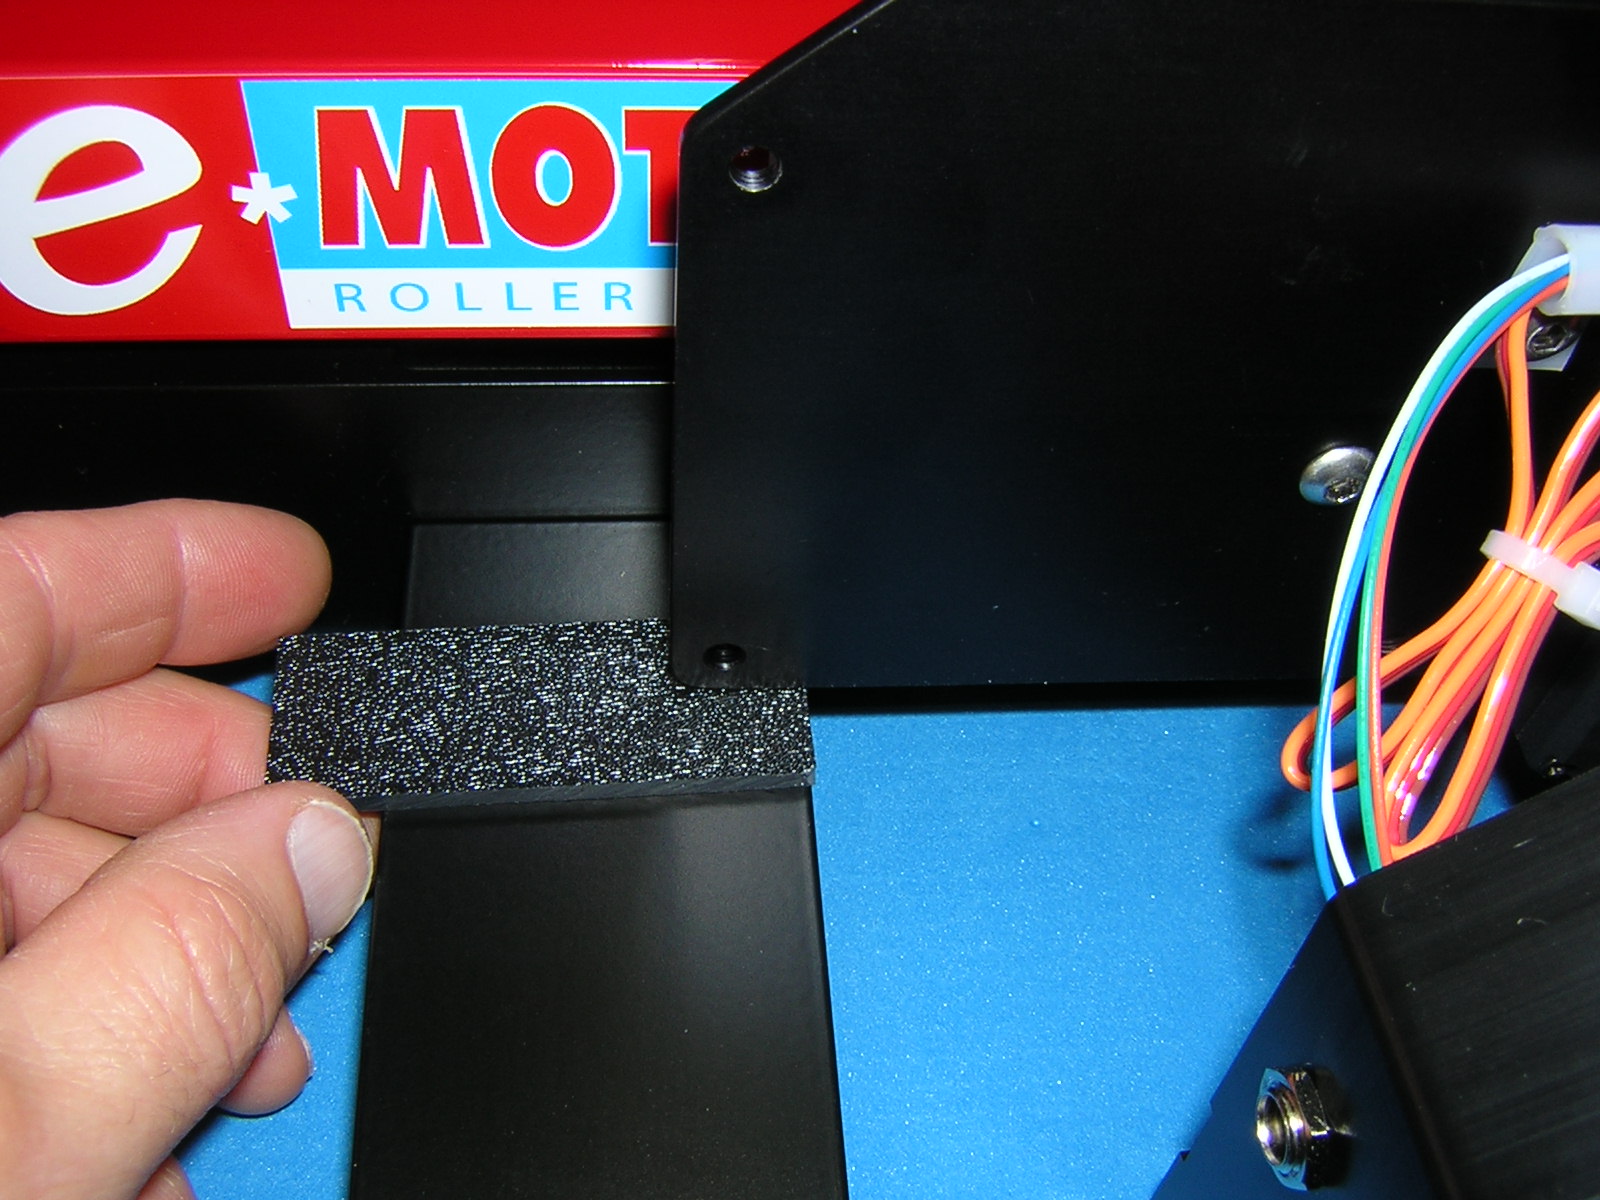
Use the small flat plastic alignment shim to be sure the unit is square to the frame. Place the shim under the backing plate, on top of the black cross member.
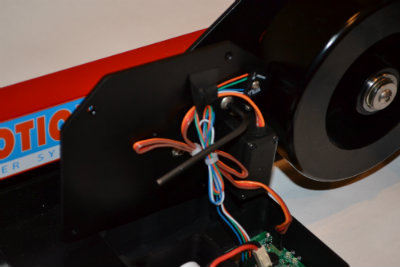
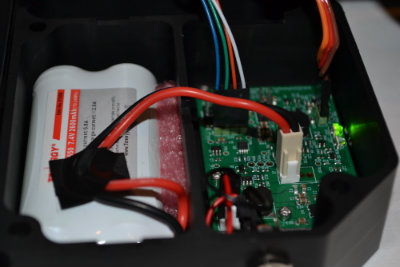
Connect the battery (red wire towards the battery). You'll notice there is a notch to indicate the only way it should attach.
-
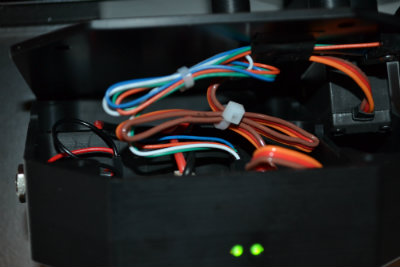
Carefully place the wires. Wires to the battery will rest in the notch between the cavities. Wires to the motor and optical sensor should rest in their respective notch. All excess wires should remain in the cavity with the circuit board and away from the edges so they are not pinched when securing the enclosure.
-
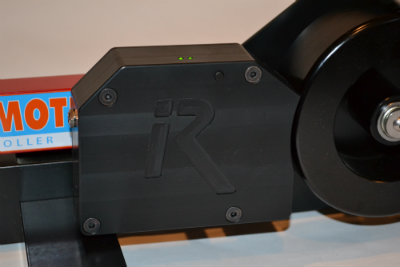
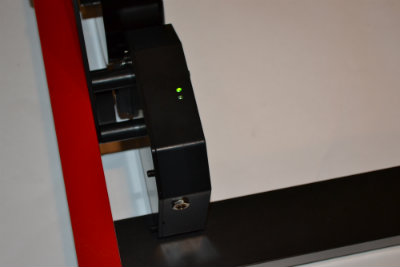
Secure the enclosure with the 4 black hex screws
-
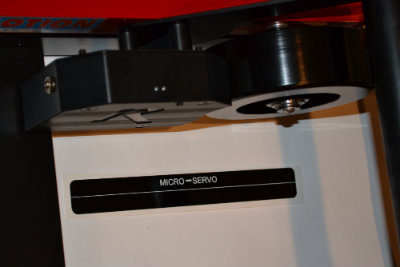
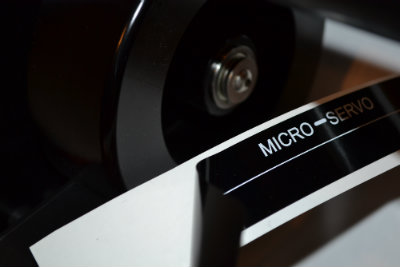
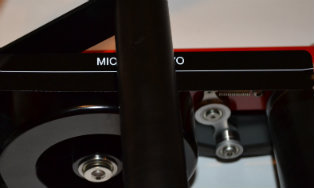
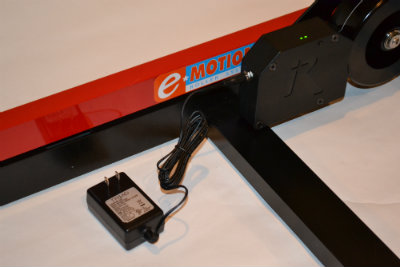
Attach the sensor sticker labelled "MICRO-SERVO" to the flywheel. Try to center the sticker in the middle of the flywheel width.
-
Step back and pat yourself on the back... yes, there were a few steps!

-
Charge your device for 2 hours. The device ships with a nominal charge, but for maximum battery life plug in the 9V adapter and charge for 2 hours. Initial testing suggests the battery should last for dozens of rides or up to 3 months, but your feedback starting with a full charge will be important as your mileage may vary.
Device Functionality
- Measures speed, calculates virtual power and adjusts resistance
-
Supports resistance modes similar to KICKR:
- Standard (Levels 0-6)
- Percentage (0-100% brake)
- Erg (target watts)
- Simulation (Wind, Grade, C, CRR)
- Works with all WAHOO Bluetooth or ANT apps, however most testing to date has been with TrainerRoad via ANT+ and WAHOO Fitness via Bluetooth on Android and iOS
- Automatically goes to sleep when no motion detected, will wake with motion
- Device Firmware Upgrade via Bluetooth
- Powered with 2,600mAh Li-Ion battery, charges via 9V power adapter
Calibration
Prerequisite
You must download and install the E-Motion Test Tool from here. Instructions for tool installation are available here.
DO NOT USE TRAINER ROAD OR WAHOO calibration methods
Currently, the only way to calibrate the E-Motion rollers is with the test tool. Do not attempt to use calibration from TrainerRoad or any other app as it will not work.
When to Calibrate
Generally speaking, unless you make a big equipment change; different wheels, different bike, gain 20lbs, take the rollers from your house at 70 degrees and move them to the garage and ride at 50 degrees, your calibration day to day should be similar and you don't need to re-calibrate the rollers.
Self Coast Down
Please use the following process to perform a coast down calibration:
Warm Up
- Wake your rollers and power meter by giving the rollers a nudge and spinning your crank/wheel
- Launch the E-Motion Test Tool version 1.6 or greater
- Pair your power meter (by clicking the Search button in the upper right)
- Press the center button on your ANT+ remote to wake the remote
- Warm up for at least 5-10 minutes on the rollers, with no resistance on.
Coast Down
When you are ready to begin the coast down:
- Press & Hold the remote's center button for approximately 2 seconds
- The rollers will enter calibration mode and indicate with a persistent red blinking light
- Ride comfortably at as stable a speed as you can roughly between 15 - 20 mph for 15 seconds or more
- The tool will collect an average, stable power number so long as you are riding at a stable speed
- Accelerate to >25 mph
- Stop pedaling and coast down to a stop
- The device automatically exits calibration mode when you decelerate below ~5 mph
Calibration Values
A new dialog will appear showing the calculation and power curve. You can repeat this process several times if you feel the values are inaccurate. It may take several tries to get a good smooth coast down.

To set these values, click the Apply button. To begin a new coast down, click the Cancel button and start the coast down process again.
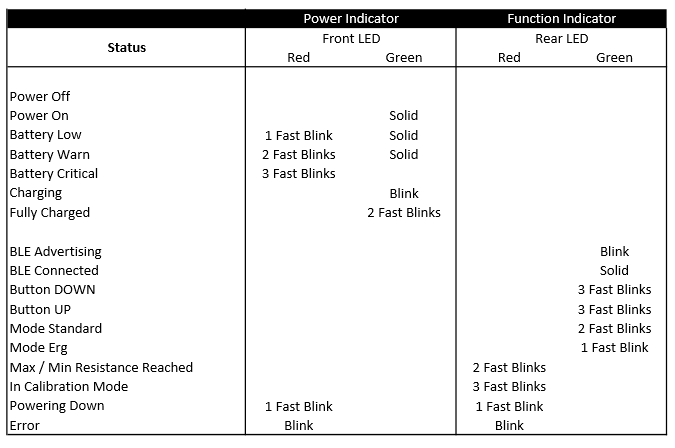
LED status indicators
Push Button switch
- Resets (i.e. restart BLE advertising after timeout) or turns on the device if in deep sleep mode
Remote Control
Please refer to the printed instructions included in the box with the remote for more details. On first use, the ANT+ remote should automatically pair with the rollers in a minute or so. The remote will blink solid green when paired. The remote will automaticaly turn off once it is no longer in range or the rollers themselves turn off.
- 3 buttons, each support short or long press
- Can be re-orientated for up/down (see instructions in the box)
- Supports manually increasing / decreasing resistance and switching between standard / erg modes
UP: increase resistance (+1 Level 0-6 or +2 watts in Erg)
DOWN: decrease resistance (-1 Level or -2 watts in Erg)
CENTER: toggle between Standard (Level 0) and Erg (last target watts)
LONG UP: Max resistance (+20 watts if in Erg)
LONG DOWN: Standard level 0 (-20 watts if in Erg)
LONG CENTER: Switches to calibration mode.
Software
The E-Motion Rollers will appear as a WAHOO KICKR in most ANT+ apps today.
Any app that supports the WAHOO KICKR should work.
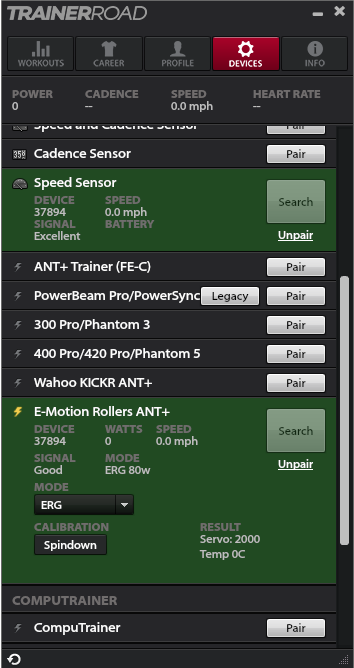
TrainerRoad PC / Mac:
Please note that you should pair both your Power Meter (if you have one) and the E-Motion rollers to TrainerRoad. Please see this article from TrainerRoad on how to work with both a Power Meter and a trainer.
You can also optionally pair the E-Motion Rollers as a Speed Sensor.
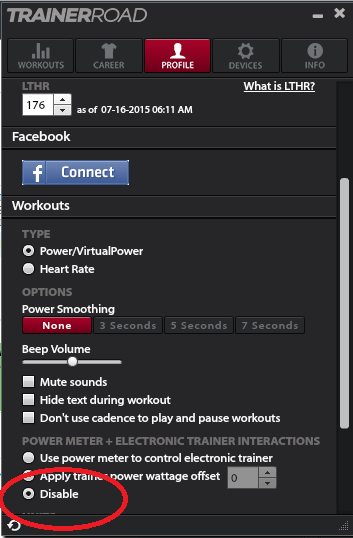
PLEASE NOTE YOU MUST DISABLE "Power Meter + Electronic Trainer Interactions"
TrainerRoad iOS, WAHOO Fitness iOS
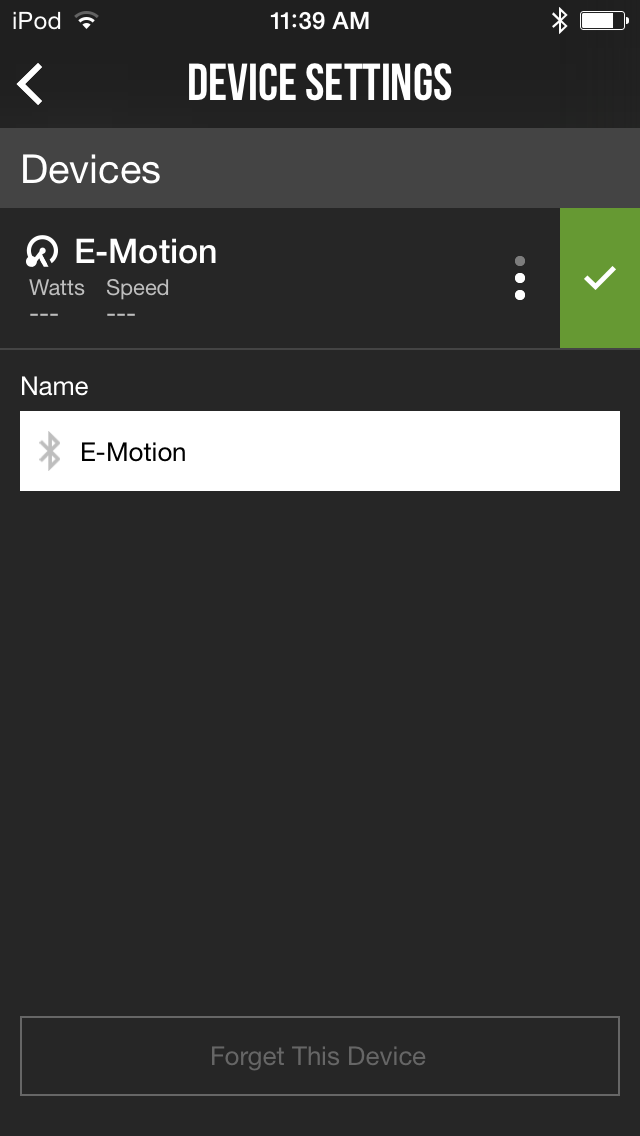
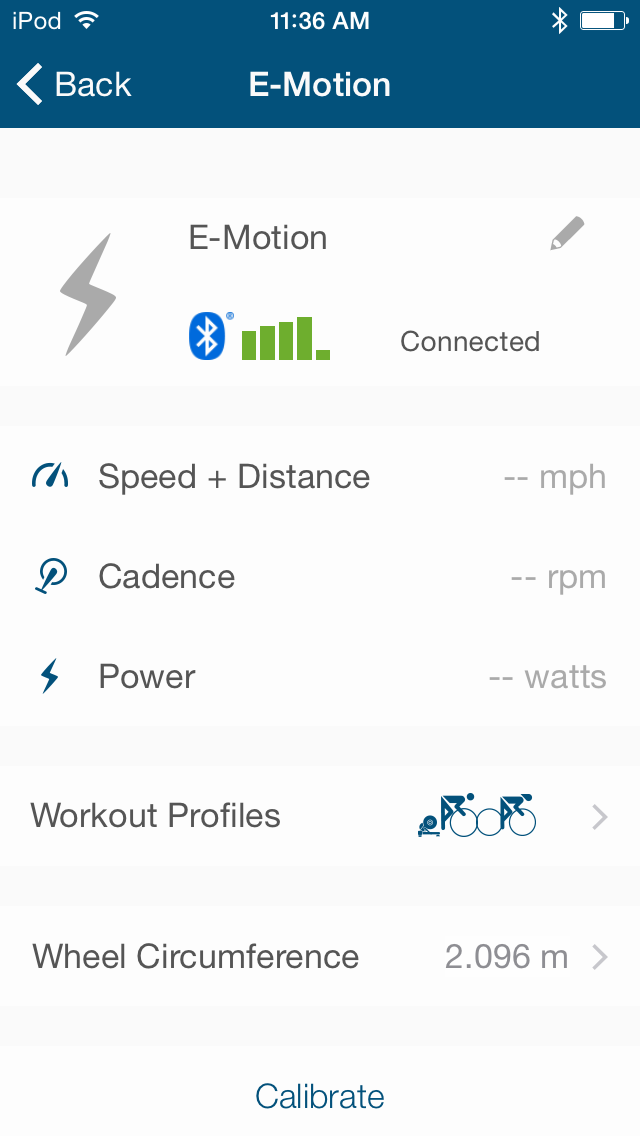
Note that when you pair with Wahoo Fitness, ensure that you select the Indoor Cycling Profile.
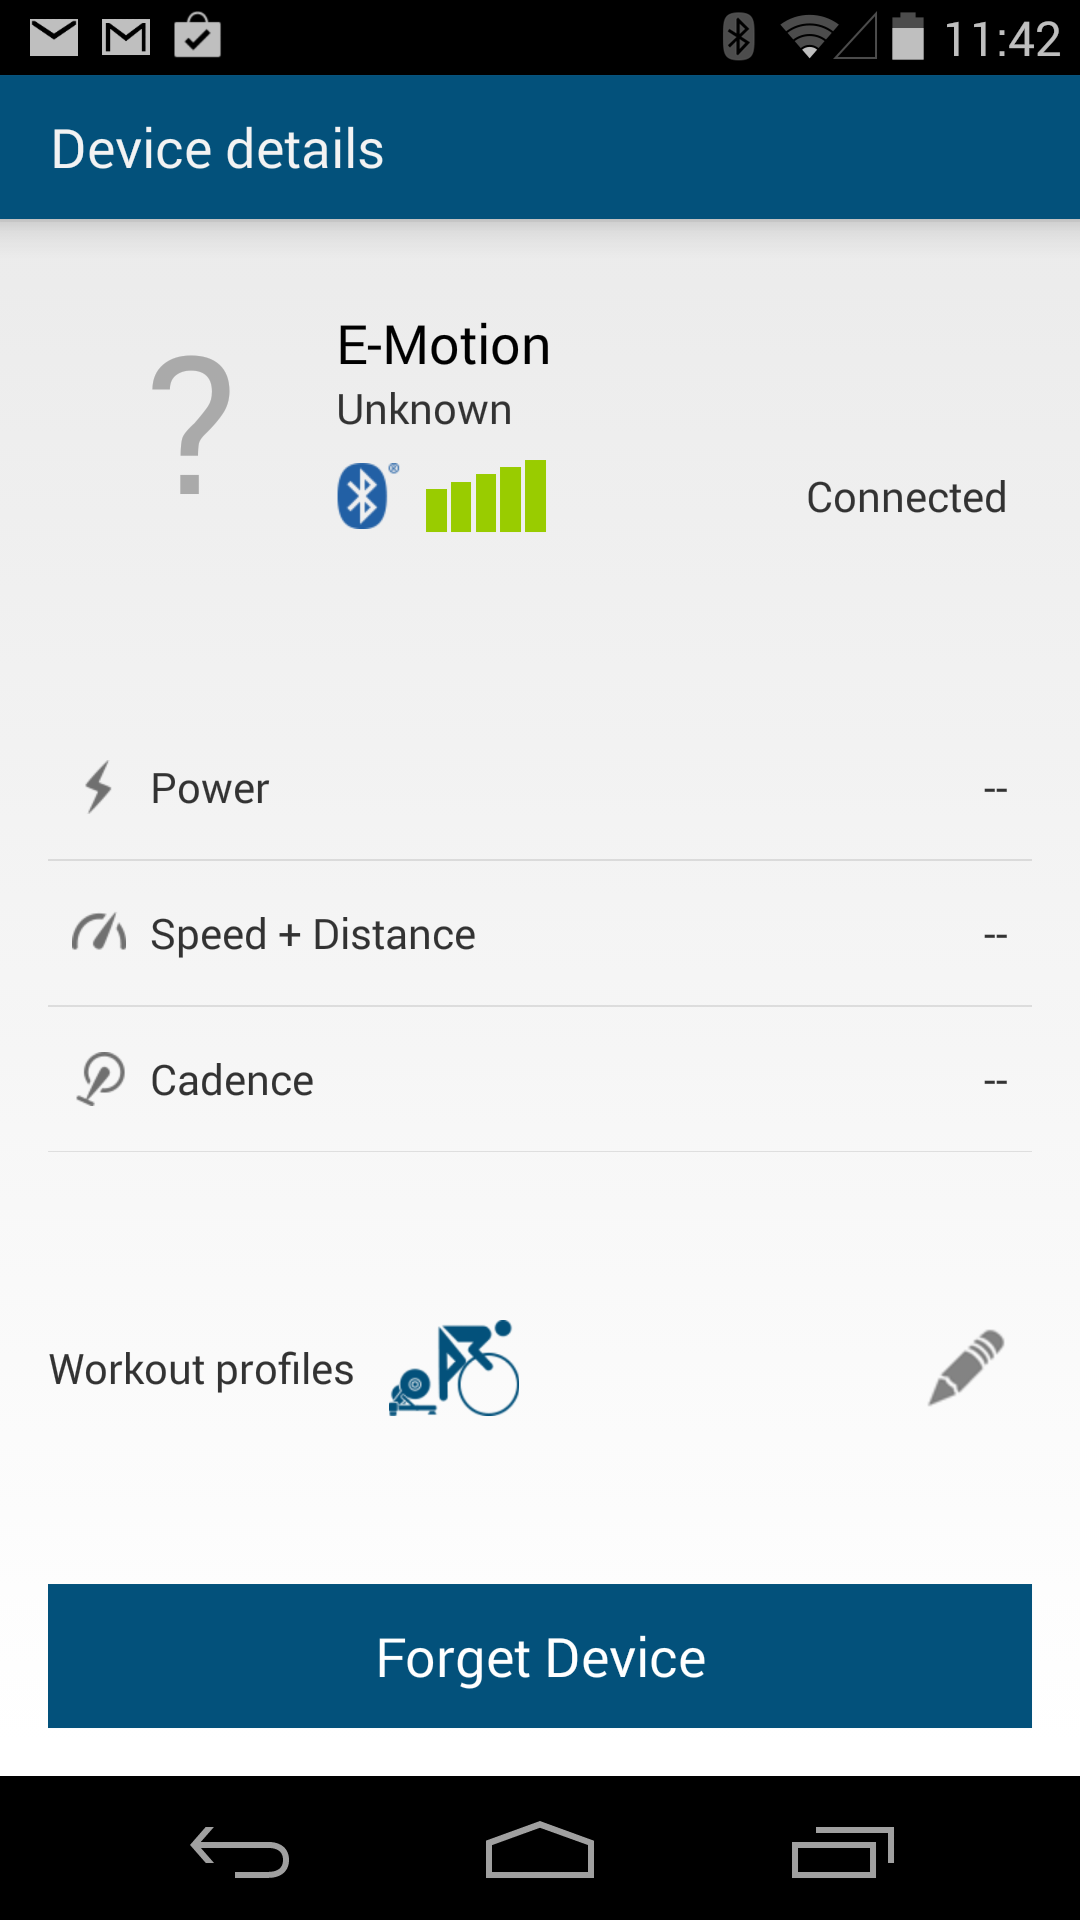
WAHOO Fitness Android:
Zwift
Zwift will recognize the E-Motion rollers as a WAHOO KICKR with Controllable Trainer. Optionally pair your power meter with Power Source.

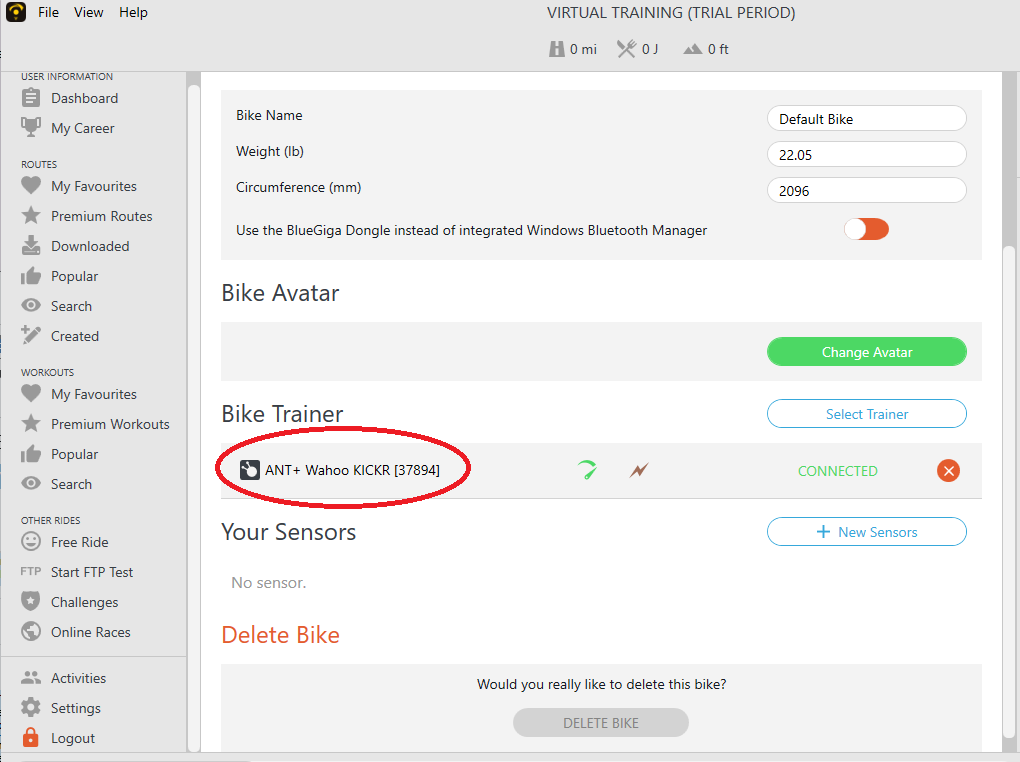
CycleOps Virtual Training
Virtual Training will recognize the E-Motion rollers as a WAHOO KICKR.
Moisture Disclaimer
Similar to our original wireless product, this device is not rated for any type of moisture exposure. We recommend that you do not use it outside and advise that if you have a tendancy to sweat excessively in that specific area, this generation may not be appropriate for you.
Only on rare occasions has this been an issue with the older device, although we do introduce new areas where moisture could enter; status LEDs, push button. We are striving to address this in a future generation of the device, but our current plan of record is to go to market as-is with the current enclosure.
Battery
After installation, you should charge the battery for approximately 2 hours. The device is fully operational while charging. Normal charge time from fully discharged is approximately 2-3 hours.
There are multiple layers of protection against overcharging, but it is always best to leave the device unplugged when not charging.
Downloads
Download firmware updates and tools here.